 Well, I had dreams of making up some plans to share with you all but here’s the deal: I build by the seat of my pants. Yes, I measure twice before cutting but sometimes things change mid-process and I’m not sure that there’s not some easier way to build this. Really, I’m far from expert in the field of carpentry. Let’s just say that that I’m very enthusiastic.
That being said – I thought there might be people out there who would at least like to see the process I went through building my little chicken coop. Originally, I planned for this to be 4′ wide by 5′ long. By the time I made up my triangular ends, the coop ended up being more like 5′ wide by 5-1/2′ long at the base. It has turned out to be a great size for us. We’ve got 4 big hens that fit in it very comfortably. I could probably squeeze another 2 in there but we’re going to keep our livestock ambitions small for now.
————————————————————————————————
Without further ado, here’s the rundown on how I made our chicken ark / coop:
The easiest way in my mind was to create panels for the outside walls. I made 2 triangles for the ends and 2 large rectangles for the sides.

Since I knew this was going to have 2 stories in it, I measured out how high I wanted the upper floor to be and then placed a piece of wood into the side rectangles at approximately that height to be able to help support the floor.
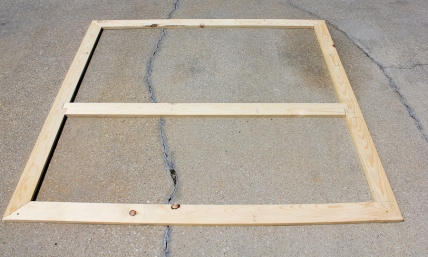

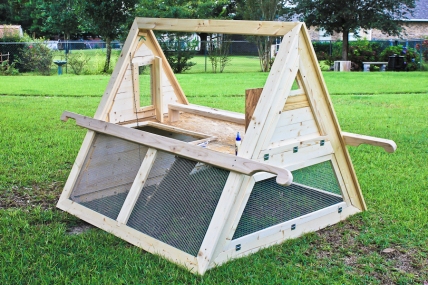
Here’s a picture I took when I was setting everything up to make sure it lined up and could support itself. My plan was to lay the side rectangles on top of the end triangles and screw them in to secure everything.

Unfortunately, I didn’t get any pictures from this point until it was almost done. I was trying to just get this thing done and was on a time crunch. Here’s what I did next:
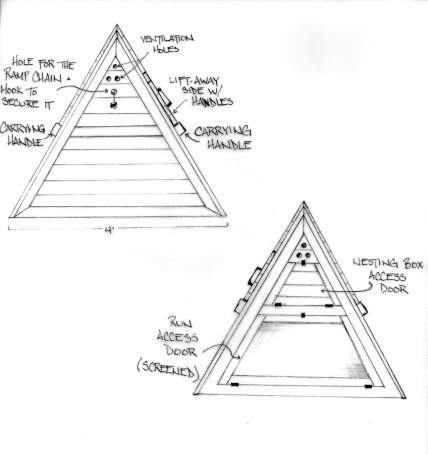
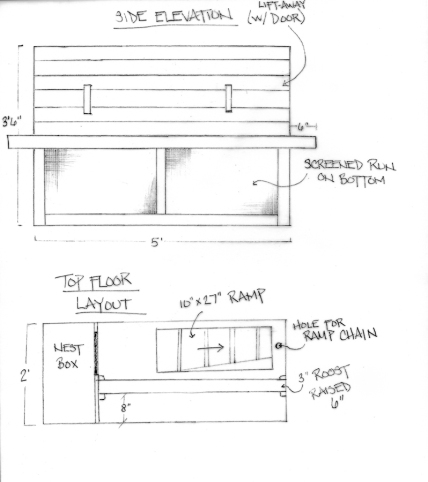
Before putting all the sides together, I made doors where I had wanted them. I made one large door in one of the triangle ends (at the bottom) and then a smaller door in the bottom of one of the sides. I wanted to be able to easily access the bottom of the coop run. What I’ve found is that we really don’t use the smaller side door but it’s nice to know we have it if we need. I also made the top door for the nesting box that would be going over top of the large screen door in the triangular end. Here’s a picture of what I had planned:
Before attaching the doors, I added screen (1/2″ hardware cloth) to the bottom 2 doors using a staple gun. This cloth isn’t very fun to work with (I got LOTS of scratches!) but I feel like it’s necessary to help keep the coop secure. I also added 1″x3″ wood planks to the small nesting box door, cut out a small window towards the top for ventilation, and stapled a bit of hardware cloth to that.

Then I added the doors to the frames with hinges. The triangular doors needed a bit of sanding on the edges to help them swing freely.
At this point, I stapled hardware cloth around the rest of the bottom panels of the rectangular sides. The last triangular end I covered completely with 1″x3″ wooden planks. Instead of ventilation holes, I cut a large window into these planks, stapled hardware cloth on the inside for security and then attached a decorative floor vent grate to the outside. This piece is one of my favorite aspects of the coop!
NOW, I could finally put the sides together. It was kind of a moment of truth – hoping that everything would line up well. The sides were attached to the triangular ends with 3″ screws.
I did do a lot of cutting, rasping and sanding of the 2×4 handles. These large poles ran about 6-1/2′ long and I cut out a design on the ends to be a little more ergonomic when you lift them. A lot of time was spend on these and I’m pretty pleased with the end result. These were then screwed into both sides right along the floor line (where the support braces were located.
Next, the floor. The measurements on the floor piece ended up being something like 36″x62″. I used pressure-treated OSB board for durability and cost-effectiveness. Just make sure you measure this part well! I screwed small pieces of leftover wood into the ends and sides at the height of ~21/22″. Then I laid in the floor and screwed it down into the support brackets.
I added a wall out of leftover OSB to separate the area for the nest box, leaving a walkway for the chickens to be able to easily access it. I also made a roost out of leftover 2×4 pieces. The roost ended up being about 30″ long and about 4″ off of the ground. I made sure to sand this down well on the edges since they stand on this part the most.
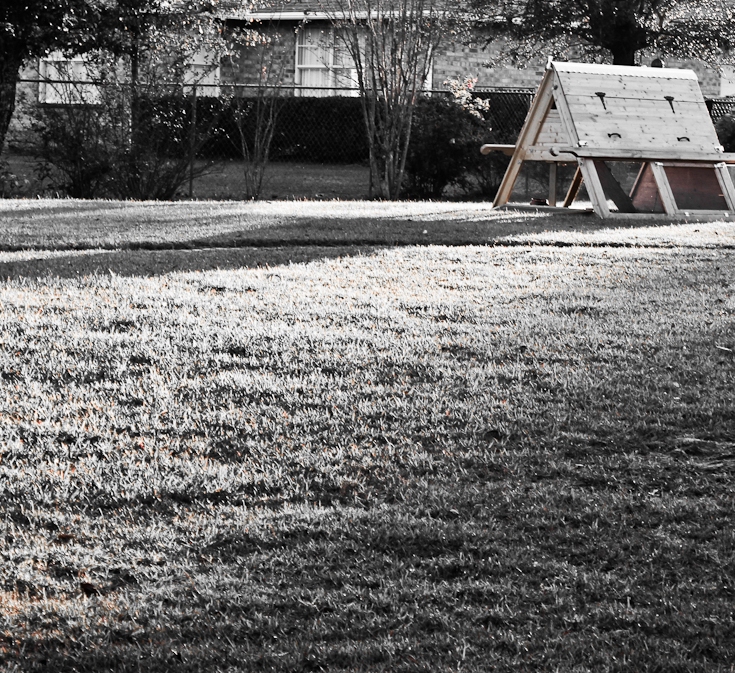
It was about this point that I realized just how heavy the coop was going to be! This is not an easily portable little structure. It’s solid and kind of bulky and definitely takes 2 adults to move. I asked Fly Guy to help me move it to the backyard just in case it would be too heavy once the roof got put on.
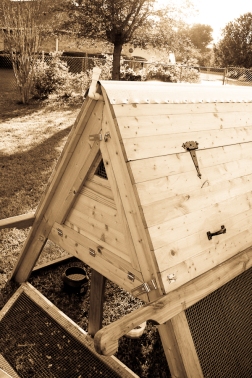
I used 1×6 boards as roofing planks. On one side, they are all just screwed into the side supports. (I did also end up putting 2 support boards on the inside part to help make everything sturdy.)
On the other side is a large access door. I screwed about 3 planks into the top and then made the door with the remaining planks and support strips. The door was then attached with large hinges on the top. I added handles for ease of use.
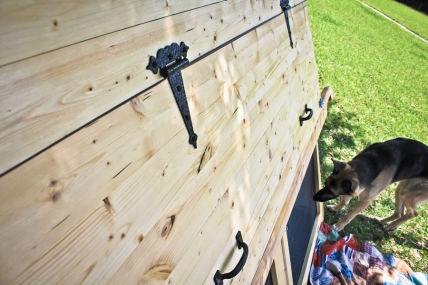
We capped the peak off with a metal ridge cap and screwed it down.
Security was one of the most important things to me when considering this kind of coop style. Not only do we lock all of the doors but there’s a ramp that we close every night after the ladies have gone to bed. I cut the ramp out of the flooring material (10″x~26″), added small wooden strips for climbing and traction, and re-attached the ramp to the floor with hinges. Then I drilled a small hole through one corner of the bottom of the ramp and secured it underneath with a knot and a screw. I drilled a small hole through the floor and also the solid wall of the end of the coop – ran the chain through both and knotted it so that it couldn’t slip through the holes. I added a screw-in, rubber-coated large hook next to the outer hole to secure the chain to at night after the ramp has been raised.

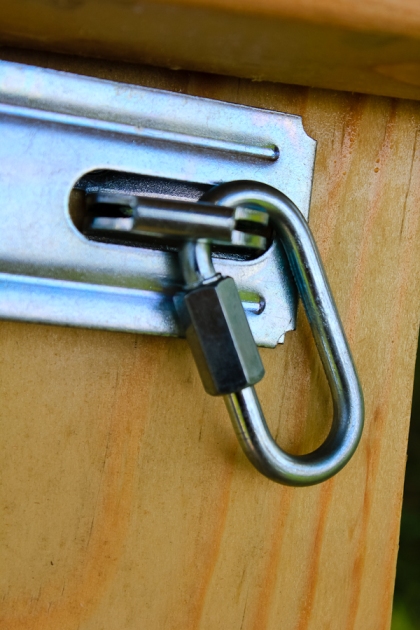
We found that regular hasp locks and quick links work very well for all of the doors.
Beyond the basic construction, I added a waterproof spar varnish to help protect the wood and keep it looking pretty. That’s about all I can think of for now. I’ll be having posts in the future on some Phase 2 coop projects to make life even easier on me. If there’s something I missed or if you have a question, just let me know. I hope this helps you on your coop-building project!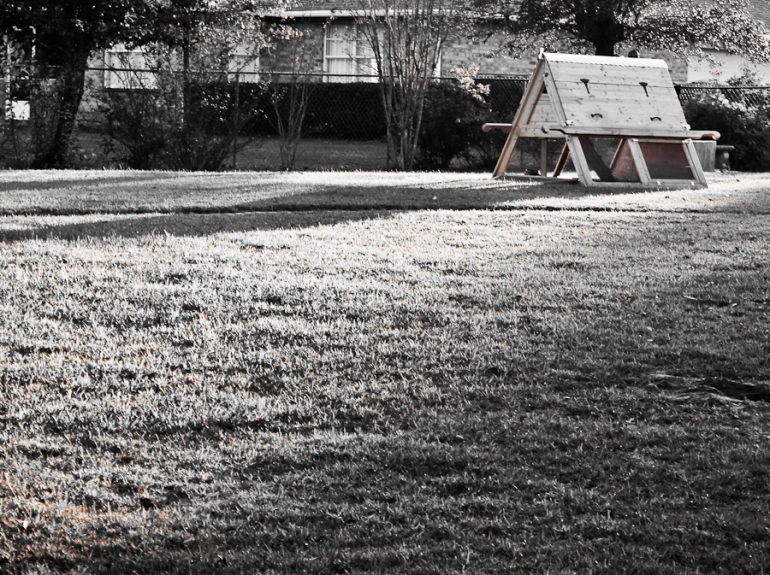
Very nice and secure design. Have you thought about putting wheels on it to help move it? Like the kind on a lawn mower that you can raise up and then lower back down after you’ve moved it. That might help with the weight of it.
Yep – that’s definitely in the works for Phase 2 of my chicken projects!
Awww shucks girls – thank you! I mainly put this out there because I find a lot of inspiration seeing other people’s projects and thought I’d share too. Thank you for your encouragement!
You are AMAZING!!!!
Really impressive, well done. Hope your chickens realise how lucky they are!
Excellent elevations and plans! I love seeing them. Your ark is amazing!